1. 사용할 라이브러리들
1) dotenv
- dotenv는 환경 변수를 .env 파일에 저장하고 이를 Node.js 어플리이케션에 로드
- 개발자가 코드에서 직접 환경 변수를 설정하는 대신 별도의 파일로 관리할 수 있게 해줍니다.
2) lodah
- JavaScript의 유틸리티 라이브러리
- 배열, 객체, 함수 등의 데이터 처리를 위한 당양한 기능을 제공
- 선응이 뛰어나고 코드의 가독성을 높이는 데 유용
3) mysql2
- MySQL 데이터 베이스와 상호 작용하기 위한 Node.js 클라이언트 라이브러리
4) protobufjs
- Google의 Protocol Buffers(포로토콜 버퍼)를 사용하여 데이터 직렬화 및 역직렬화를 지원하는 라이브러리
add) 직렬화 : 메모리를 디스크에 저장하거나 네트워크 통신에 사용하기 위한 형식으로 변환하는 것
역직렬화 : 디스크에 저장한 데이터를 읽거나, 네트워크 통신으로 받은 데이터를 메모리에 쓸 수 있도록 변환하는 것
5) uuid
- 고유한 식별자(UUID)를 생성하기 위한 라이브러리
- 다양한 버전의 UUID를 지원
2. 패킷 구조 + 프로토 버프
1) protobufjs 간단 사용법
person.proto 파일
syntax = "proto3"

message Person {
 string name = 1
 int32 id = 2;
 string email = 3
 }
프로토 버프를 활용해서 쉽게 패킷의 구조를 만들 수 있다.
import protobuf from 'protobufjs'

protobuf.load("person.proto").then(root => {
 // 'person.proto' 파일 로드합니다.

 const Person = root.lookupType("Person");
 // 'Person' 메시지 타입을 'root' 객체에서 찾습니다.
 // 이는 person.proto 파일에서 정의한 메시지 타입입니다.

 const message = Person.create({ name : "John Doe", id : 123, email : "johndoe@example.com"});
 // 'Person' 메시지 타입을 사용하여 새로운 메시지 객체를 생성합니다.
 // 여기서는 name, id, email 필드를 설정합니다.

 const buffer = Person.encode(message).finish();
 // 생성된 메시지 객체를 바이너리 형식으로 인코딩합니다.
 // 'finish' 메서드는 최종 인코딩된 버퍼를 반환합니다.

 const decodedMessage = Person.decode(buffer);
 // 인코딩된 버퍼를 다시 메시지 객체로 디코딩 합니다.

 console.log("Original Message : ", message);
 // 원래 생성된 메시지 객체를 콘솔에 출력합니다.

 console.log("Encoded buffer : ", buffer);
 // 인코딩된 바이너리 버퍼를 콘솔에 출력합니다.

 console.log("Decoded message : ", decodedMessage):
 // 디코딩된 메시지 객체를 콘솔에 출력합니다.

 })
2) 패킷 구조 설계
이번 프로젝트에서 공통적으로 사용할 패킷의 구조를 정해봅시다.
아직까지는 TCP에코 서버와 크게 다르지 않습니다.
바이트 배열의 구조
| 필드 명 | 타입 | 설명 | 크가 |
| totalLength | int | 메세지의 전체 길이 | 4 Byte |
| packetType | int | 패킷의 타입 | 1 Byte |
| protobuf | protobuf | 프로토콜 버퍼 구조체 | 가변 |
프로토 버프 구조
우리가 지금 알고 넘어가면 좋은 것은 크게 아래 2가지 입니다.
이러한 데이터들을 주로 주고 받게 될 것이라고 미리 알려드리는 것 입니다.
프로젝트를 진행하면서 천천히 파일 생성 및 로드를 해봅시다.
- common
아래의 구조로 클라이언트 요청을 할 것이며 'payload'에 각 핸들러에 맞는 데이터가 들어가게 됩니다.
필드 명 타입 설명 handlerId uint32 핸들러 ID (4 바이트) userId string 유저 ID (UUID) clientVersion string 클라이언트 버전 (문자열) sequence uint32 유저의 호출 수 (42억) payload bytes 실제 데이터 syntax = "proto3" package common; // 공통 패킷 구조 message Packet { uint32 handlerId = 1; // 핸들러 ID (4바이트) string userId = 2; // 유저 ID (UUID) string clientVersion = 3; // 클라이언트 버전 (문자열) uint32 sequence = 4; // 유저의 호출 수 (42억) bytes payload = 5; // 실제 데이터 } - Response
클라이언트 요청에 대해서는 아래의 구조로 반환해주게 됩니다.
| 필드 명 | 타입 | 설명 |
| handlerId | uint32 | 핸들러 ID |
| responseCode | uint32 | 응답 코드 (성공 : 0, 실패 : 에러 코드) |
| timestamp | int64 | 메시지 생성 타임스탬프 (Unix 타임스탬프) |
| data | bytes | 실제 응답 데이터 (선택적 필드) |
| sequence | uInt32 | 시퀀스 값 |
syntax = "proto3";

package response;

// 공통 응답 메시지 구조
message Response {
  uint32 handlerId = 1;      // 핸들러 ID
  uint32 responseCode = 2;   // 응답 코드 (성공: 0, 실패: 에러 코드)
  int64 timestamp = 3;       // 메시지 생성 타임스탬프 (Unix 타임스탬프)
  bytes data = 4;            // 실제 응답 데이터 (선택적 필드)
  uint32 sequence = 5;       // 시퀀스 값
}
3. 프로젝트 시작하기 + 코드 가져오기
이전에 만들었던 프로젝트에서 코드를 가져와 적용해보겠습니다.
1) 프로젝트 시작하기
- yarn init -y
- 깃허브 연동
- 필수 라이브러리 다운로드
- prettier 설정, nodemon을 활용해 package.json 에 실행 스크립트 작성
- 'net' 모듈을 사용한 기본 TCP 모델 src/server.js 파일에 작성
yarn add dotenv lodash mysql2 protobufjs uuid
yarn add -D nodemon prettier
받기
package.json에
과
추가하기
최종 수정된 package.json
.prettierrc
2) 이전 프로젝트에서 코드 가져오기

assets.js 파일에
붙여 넣기
3) 이전 프로젝트에서는 서버 시동 이후 게임 에셋을 로드 하는 방식이었지만,
이번 프로젝트는 서버 초기화에 여러 작업이 들어가게 될 예정이라 서버 시동 이전에 로드를 하는 것으로 작성하겠습니다.
init/index.js 파일 생성하기
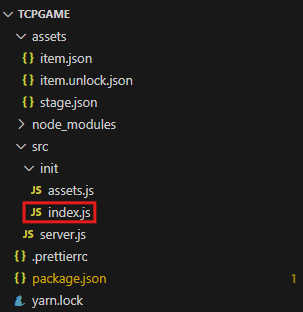
index.js 파일에
붙여 넣기
server.js 파일에서 기존 서버 실행을
initServer()함수 실행 후, then()을 통해 실행하기
이때, catch문으로 오류 발생 시 console.error(e)와 process.exit(1)로
오류 문구 출력 및 프로그램 종료
'Node 강의 > 주특기 플러스' 카테고리의 다른 글
| 2-3 (중요)이벤트 구분, 바이트 배열 분해 (0) | 2024.10.21 |
|---|---|
| 2-2 중앙집중식 환경변수 관리 (0) | 2024.10.21 |
| 1-4 패킷 구조 설계하기 및 코드 구현 (0) | 2024.10.17 |
| 1-3 간단한 데이터 교환 (0) | 2024.10.17 |
| 1-2 바이트와 버퍼 객체 (0) | 2024.10.17 |